A sheet pan dinner is a schedule, not a recipe. You decide which thing on the pan takes the longest, you start the clock on that, and you add everything else counting backward from the minute you want to eat. Learn the schedule once and you can build one out of whatever the store had, on a Tuesday, without looking anything up.

This page is for the person who has already tried it and pulled out a pan of pale, slumped vegetables sitting in their own liquid next to chicken that was either dry or still pink at the bone. That is not a bad recipe. It is almost always one of two things, and the first is a timing problem: on the sheet pan chart at Naturally Gluten-Free, potatoes, carrots and winter squash need 45 to 50 minutes at 400°F, while asparagus, shrimp and thin white fish need 10 to 15. Put both on the pan at the same moment and one of them is wrong by half an hour. There is no oven setting that fixes that.

The second is crowding, and it is the one people defend hardest, because a full pan feels efficient. Recipe developer Sara Nelson puts it as plainly as anyone: "When vegetables are too close together, the steam they release as they cook has nowhere to go." The pan then steams what you meant to roast. Everything below is built on those two facts.

One note on evidence, since this is a page about numbers. The internal temperatures come from USDA's Food Safety and Inspection Service and I treat them as fixed. The cook times come from roasting charts written by recipe developers, not from a lab, and they were checked against those sources in September 2026. Use them as windows, then judge vegetables by fork and protein by thermometer.

What the oven is doing to the food

Roasting is a dry-heat method, and that is not a technicality. Nelson's framing in her piece on soggy sheet pan vegetables is the clearest short statement of the mechanism I have read: "The whole point is to concentrate flavor and create texture through direct contact with heat, and water works against both."

Here is the sequence. Vegetables are mostly water, and heat drives that water out. If the steam can leave, the surface dries, the surface gets hot enough to brown, and you get the crisp outside and tender inside people are actually after. If the steam cannot leave, it sits against the food, holds the surface at boiling temperature, and the food poaches in a thin film of its own liquid. Three things decide which of those happens: how much air is between the pieces, how wet they were when they went on, and what the pan is made of. Nelson's spacing rule is a minimum half-inch gap between every piece, with the blunt test that if the pan looks full before it goes in the oven, it is already too crowded.

Oven temperature matters less than any of that, which is why I am comfortable disagreeing with half my sources about it. My default is 425°F. Easy Everyday Recipes gives 400 to 450°F as the working range and names 425°F the practical starting point; Chef Approved Tools calls 425°F optimal for most vegetables; Nelson recommends a consistent 425°F on the grounds that lower temperatures soften vegetables before they can caramelize.

The other side has a real case. Erin Clarke at Well Plated says flatly, "The best temperature for roasting vegetables is 400 degrees F," and both the staggered chart at Naturally Gluten-Free and Piper Cooks' two-pan method are calibrated at 400°F. The argument for it is not timidity, it is margin: on a mixed pan where one item has been in for 25 minutes and another just landed, 400°F gives you a wider gap between cooked through and burnt at the edges. That is worth respecting. What it does not do is rescue a crowded pan or a wet one, and a 25 degree difference will never matter as much as a half inch of air. So: 425°F as the standard, dropping to 400°F for the watery tender vegetables, which is what Chef Approved Tools does with zucchini and bell peppers.

Everything on at once One pan, staggered adds Two pans
How it works Cut, dry, oil, load, one bake, one pull. The slowest items get a head start and quick items go on partway through. Naturally Gluten-Free describes it as "giving slower foods a head start or adding quick-cooking ingredients later." Dense vegetables on one pan, quick ones on a second. Piper Cooks roasts potatoes, carrots, onions and garlic alone for 25 minutes, then adds a second pan of broccoli, bell pepper and green beans for 20 minutes more.
Oven temperature the source uses 400°F in a standard oven (Well Plated) 400°F across the whole chart (Naturally Gluten-Free) 400°F (Piper Cooks)
Total time 25 to 35 minutes for a vegetable pan in a standard oven (Well Plated) Set by the slowest item: 45 to 50 minutes if that is potatoes, carrots, winter squash or chicken legs (Naturally Gluten-Free) About 45 minutes across both pans (Piper Cooks)
What it asks of you One timer and nothing else. Two or three trips to the oven door, and the order decided before you start. Both racks, in the upper and lower thirds, with each pan rotated 180 degrees and the racks swapped halfway through (Well Plated).
Where it breaks It is only honest when everything shares a timing window. Asparagus at 10 to 15 minutes and potatoes at 45 to 50 do not (Naturally Gluten-Free). The late additions land on a pan that is already full, and you lose the half-inch gaps Nelson says you need. Two pans to wash and both racks tied up. Worth it only when one pan would have been crowded.
Use it when The pan holds one vegetable and one fast protein, such as shrimp with peppers. Most weeknights, and any pan with more than one kind of vegetable on it. You are feeding more people than one pan holds with air between the pieces. Nelson's position is that two properly spaced pans beat one crowded one.

The pan is not a neutral surface

Every source I looked at that mentions equipment says the same two words: rimmed and metal. Nelson's advice in her piece on the one sheet pan mistake is to switch out of glass and ceramic baking dishes in favor of rimmed aluminum sheet pans, because metal conducts heat more effectively and lets surface moisture evaporate, while glass and ceramic trap steam around the food. Easy Everyday Recipes makes the same point about depth: a sturdy, rimmed sheet pan gives broad contact with the heat and lets moisture escape, where a deep casserole dish holds it in. Jacqueline Piper at Piper Cooks says it in one line: "A large, sturdy rimmed baking sheet works the best for roasting vegetables."

So the rim is there to catch fat and juice, not to hold the food in a well. High sides are the enemy of the whole method. None of these sources specifies pan dimensions, so I will not invent a figure: buy the largest rimmed metal sheet that leaves air on all sides in your oven, and buy two of them, because the fix for a crowded pan is a second pan and nothing else.

Chef Approved Tools adds one step most people skip, which is preheating the empty pan for 10 minutes before the vegetables go on, so browning starts on contact. It works, and it is the difference between a hiss and silence when the first pieces land.

On liners, the honest answer is narrower than the internet's. Piper Cooks says parchment is optional and mainly helps prevent sticking. Nobody in front of me has tested browning on parchment against bare metal, so I am not going to tell you parchment costs you a crust. What I do in my own kitchen is roast on bare metal and scrub the pan, because the preheated-pan trick only makes sense if the food is touching the pan.

Building the pan in order

What follows assumes a 45-minute pan, because that is the length a dense vegetable sets. If your slowest item is salmon, the whole schedule collapses to 20 minutes and you skip most of this.

  • Two rimmed metal sheet pans

    One is enough for two or three people. The second is what you use instead of stacking pieces, per Nelson.

  • An instant-read thermometer you have calibrated

    FSIS is explicit that safe temperature is measured with a food thermometer, not read off color or juices. TemperatureTool notes uncalibrated probes can drift 5 to 10°F and suggests a monthly ice-water check, which should read 32°F.

  • A kitchen towel you do not mind staining

    For drying vegetables after washing. This is a step, not a nicety.

  • Oil, measured

    Chef Approved Tools puts it at 1 to 2 tablespoons per pound of vegetables, not a free pour.

  • Salt and one or two dry seasonings

    Anything that survives 45 minutes of dry heat. Wet marinades add back the water you just removed.

  • Tongs or a thin metal spatula

    For the single mid-roast toss, and for getting browned faces off the pan without tearing them.

1. Preheat all the way, and preheat the pan with it. Easy Everyday Recipes lists insufficient preheating as one of its six causes of sogginess, and the distinction it draws is the right one: an oven set to 425°F is not the same as an oven at 425°F. Put the empty sheet pan in for the last 10 minutes of the preheat. Costs you nothing but the time you were going to spend cutting anyway. You will know it worked when the first vegetables hiss as they touch the metal.

2. Name the slowest thing on the pan. That is your clock. Potatoes, carrots and winter squash sit at 45 to 50 minutes on the Naturally Gluten-Free chart, and so do chicken legs. Shrimp and thin white fish are at the other end, 10 to 15 minutes. Whatever the longest number is, that is when the pan goes in and when it comes out, and everything else is scheduled backward from the end.

3. Cut by density, not by habit. This is where a mixed pan is won. Well Plated's sizing is the most useful I found: dense roots like beets and sweet potatoes cut small, into three-quarter-inch pieces; long roots like carrots and parsnips halved lengthwise then cut into 1.5-inch crosswise pieces; broccoli and cauliflower into 1.5 to 2-inch florets; Brussels sprouts halved; green beans and asparagus left whole. Chef Approved Tools cuts potatoes into 1-inch cubes and carrots into half-inch rounds. Nelson's version of the same rule is uniform 1 to 1.5-inch pieces so nothing finishes ahead of its neighbors. The point of cutting a dense vegetable smaller is that size buys you timing: a small piece of sweet potato can finish with a big piece of broccoli.

4. Dry everything, properly. Nelson's fix is a kitchen towel after washing, a few minutes sitting uncovered if you have them, and only then the oil. Her reason is that even a thin film of water on the surface turns to steam the moment it hits heat, and browning waits for that water to leave. You can see this one happen: a wet pan is silent for the first ten minutes, and the pieces come out looking boiled.

5. Oil modestly, and season now. One to two tablespoons per pound, says Chef Approved Tools, applied evenly. Easy Everyday Recipes flags excess oil as its own separate mistake, producing a heavier, greasier texture instead of a clean roast. Salt goes on now with whatever dry seasoning you like. If your oil and spice shelf is a graveyard of single-use jars, that is a pantry problem worth fixing before it is a roasting problem.

6. Load the slow items with air between them. Half an inch minimum between pieces, in a single layer, with no overlapping. Clarke's phrasing at Well Plated is that "vegetables need to roast in a single layer without overlapping," and Nelson's is "one layer, no overlapping, and actual air between pieces, not just touching side by side." Leave empty space for whatever is coming later, or accept now that you are using two pans.

7. Put the protein on at its own minute. Counting back from the end of a 45-minute pan: chicken legs go on at minute zero, since they need 45 to 50 minutes. Chicken breast, sausages, pork tenderloin and cubed extra-firm tofu all need 25 to 35 minutes, so they go on around minute 10 to 20. Boneless pork loin chops need 20 to 30. Salmon fillets need 15 to 20, and shrimp or thin white fish 10 to 15. Bone-in chicken thighs are the most forgiving protein on a mixed pan, and the thigh-and-vegetable schedule is worth reading end to end if that is your default dinner.

8. Add the quick vegetables with their window left on the clock. Halved Brussels sprouts and broccoli florets want 20 to 25 minutes at 425°F, cauliflower 25 to 30, zucchini rounds and bell peppers 15 to 20 at 400°F, asparagus 10 to 15. So the sprouts go on with 25 minutes left, the zucchini with 20, the asparagus with 15. When they land, spread them into the gaps you left rather than on top of the roots.

9. Toss once, at the halfway mark, and no more. Chef Approved Tools is specific about this: stir only once, halfway, to preserve the caramelization that has formed on the faces touching the pan. Every extra toss interrupts it. If you are running two pans, Well Plated's method is to rotate each pan 180 degrees and swap the rack positions at the same halfway moment.

10. Temperature the protein. Do not look at it. This is the one step where the sources are a government agency and there is no argument. USDA's FSIS chart sets all poultry, whole or in parts or ground, at 165°F; whole-muscle beef, pork, lamb and veal at 145°F with a 3-minute rest; fish and shellfish at 145°F; ground beef, pork, lamb and veal at 160°F; egg dishes at 160°F. Insert the probe into the thickest part, away from bone, fat and gristle. For a whole bird, TemperatureTool's reading of the guidance is to check three points: the innermost thigh, the innermost wing and the thickest part of the breast.

11. Rest the meat, and do not cover the vegetables. FSIS explains the 3-minute rest as the window in which the temperature stays constant or keeps rising, which is what finishes destroying pathogens. Meanwhile, Clarke's answer on covering roasted vegetables is one word: "No, it is not necessary to cover roasted vegetables," because covering traps moisture and steams what you just spent 45 minutes drying out. A pan tented with foil on the counter undoes the whole method in four minutes.

12. Deal with the leftovers on the clock too. FSIS puts the danger zone at 40°F to 140°F and notes bacteria can double in as little as 20 minutes inside it, with a 2-hour limit on perishable food out of refrigeration. Leftovers go into shallow containers so they cool fast and into the fridge within those 2 hours, and back out at 165°F, which FSIS says kills most foodborne bacteria within seconds.

Group What's in it Minutes it needs When it goes on a 45-minute pan
Slowest Potatoes, carrots, winter squash and chicken legs (Naturally Gluten-Free, charted at 400°F). Chef Approved Tools puts 1-inch potato cubes at 30 to 45 minutes at 425°F. 45 to 50 Minute 0, onto the preheated pan
Slow Chicken breast, sausages, pork tenderloin, cubed extra-firm tofu and frozen vegetable mixes (Naturally Gluten-Free), frozen Brussels sprouts at 30 to 40. Sweet potatoes, cauliflower, onion wedges and carrot rounds at 25 to 35 at 425°F (Chef Approved Tools). 25 to 35 With 25 to 35 minutes left, so minute 10 to 20
Medium Boneless pork loin chops at 20 to 30, green beans and cherry tomatoes at 20 to 25 (Naturally Gluten-Free). Halved Brussels sprouts and 2-inch broccoli florets at 20 to 25 at 425°F (Chef Approved Tools). 20 to 30 With 20 to 30 minutes left, so minute 15 to 25
Fast Salmon fillets, mushrooms and onions at 15 to 20 (Naturally Gluten-Free). Half-inch zucchini rounds and 1-inch bell pepper pieces at 15 to 20, dropped to 400°F (Chef Approved Tools). 15 to 20 With 15 to 20 minutes left, so minute 25 to 30
Very fast Shrimp, thin white fish and asparagus (Naturally Gluten-Free). 10 to 15 With 10 to 15 minutes left, so minute 30 to 35

Two things about that chart. The Naturally Gluten-Free windows are calibrated at 400°F and the Chef Approved Tools windows at 425°F, so if you are running the hotter oven, check at the early end of every range. And cut size moves these numbers as much as anything in your control: a three-quarter-inch piece of sweet potato is in a different group than a 2-inch chunk of the same sweet potato.
Where it goes wrong

The pan looked full when it went in. How you know: no browned faces at all, the pieces are glossy and slumped, and there is liquid in the bottom of the pan. Nelson identifies crowding as the single biggest cause of sogginess, because packed vegetables trap the moisture they release. The fix is not more time or more heat, it is half-inch gaps and a second pan.

The vegetables were still wet. How you know: silence for the first ten minutes, then vegetables that taste steamed. Nelson's fix is a towel after washing, a short air dry, then the oil.

Too much oil. How you know: heavy and slick rather than crisp, and the pan needs a real scrub. Easy Everyday Recipes lists this separately from crowding for a reason. One to two tablespoons per pound, spread evenly.

It was a glass or ceramic dish. How you know: browning on top, nothing underneath, and a puddle. Nelson's explanation is that metal conducts heat effectively and lets moisture evaporate, while glass and ceramic trap steam around the food.

The oven was not at temperature, or was set too low. How you know: everything cooks through and nothing colors. Nelson's argument for a consistent 425°F is exactly this: below the caramelization range, vegetables soften before they brown, and once they are soft you have lost the chance.

Everything went on at once. How you know: the broccoli is collapsing while the potato is still firm in the middle. There is no temperature that reconciles a 45 to 50-minute item with a 10 to 15-minute one, which is why both Piper Cooks and Naturally Gluten-Free build their methods around staggering rather than around a setting.

You kept stirring. How you know: even color, no crust anywhere. Chef Approved Tools recommends one stir at the halfway point, and the reason is that browning happens where the food sits still against hot metal.

You judged the protein by looking at it. How you know: you cannot, which is the point. FSIS's page on doneness versus safety cites a 1995 Kansas State University study and USDA research finding more than 25% of fresh ground beef patties turned brown before reaching the safe 160°F. Its conclusion runs both ways: "A hamburger cooked to 160 °F as measured with a meat thermometer, regardless of color, is safe." Color is not evidence in either direction.

The thermometer was lying. How you know: readings that do not match how the food behaves. TemperatureTool notes uncalibrated probes can be off by 5 to 10°F and recommends a monthly ice-water check that should read 32°F. It also warns against using carryover cooking, typically a 3 to 10°F rise during the rest, as a reason to pull meat early: the minimum has to be reached first.

When the rules change

You have convection. Well Plated's convection setting is 375°F for 20 to 25 minutes, against 25 to 35 minutes at 400°F in a standard oven. The lower temperature compensates for the fan moving heat faster, so shift every check earlier in the schedule, not just the final one.

You are running two racks. Position the pans in the upper and lower thirds, then rotate each pan 180 degrees and swap the rack positions halfway through, which is Well Plated's method for getting even results out of two levels.

The vegetable is watery and tender. Chef Approved Tools keeps most vegetables at 425°F but drops zucchini and bell peppers to 400°F. If your pan is nothing but summer vegetables, use 400°F for the whole thing.

The vegetables are frozen. On the Naturally Gluten-Free chart, frozen vegetable mixes need 25 to 35 minutes and frozen Brussels sprouts 30 to 40, where fresh halved sprouts need only 20 to 25 at 425°F per Chef Approved Tools. Frozen items belong in the earlier group, and they need more space than fresh, not less.

The protein is ground, or it is eggs. The 145°F number does not apply. FSIS sets ground beef, pork, lamb and veal at 160°F and egg dishes at 160°F, and all ground poultry at 165°F along with the rest of the bird. Sheet pan meatballs are a 160°F dish, and a sheet pan frittata is a 160°F dish.

The sausage or ham is already cooked. TemperatureTool's reading of the USDA guidance splits these: USDA-inspected precooked packaged ham reheats to 140°F, while precooked ham from an unknown source goes to 165°F, the same standard as leftovers.

The kitchen is hot. FSIS's usual 2-hour limit for perishable food out of refrigeration drops to 1 hour when the ambient temperature is above 90°F. That is a real constraint if you prep at 5pm in an unairconditioned kitchen and the pan does not go in until 6.

Five pairings that fit the clock

These are not recipes, they are schedules. I have built them around what tends to pile up in the produce section in late September, which where I shop means Brussels sprouts, winter squash and sweet potatoes. Swap any item for another in the same timing group and the schedule still holds.

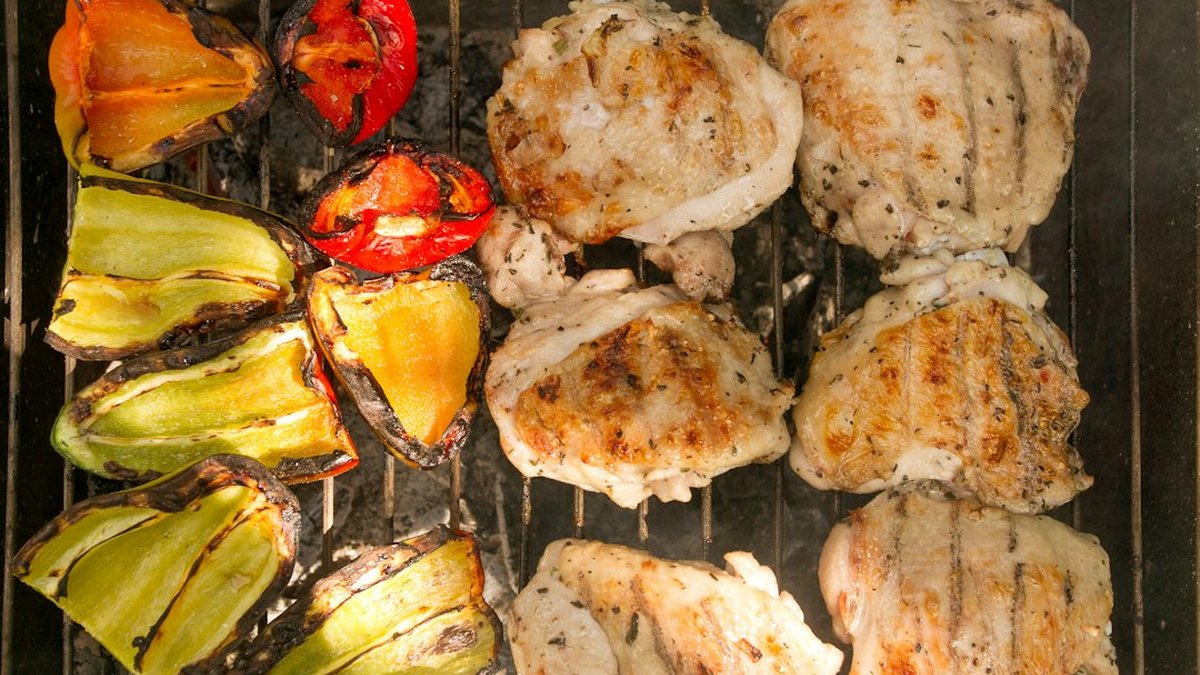
Chicken legs with potatoes, carrots and winter squash. Everything is in the 45 to 50-minute group on the Naturally Gluten-Free chart, so everything goes on at minute zero and nothing gets added. The easiest pan there is, and the one to cook when you have no attention to spare. Legs come out at 165°F.

Sausages with sweet potato and halved Brussels sprouts. Sweet potato cubes at 425°F need 25 to 35 minutes and sausages need 25 to 35, so both go on together; the sprouts join with 25 minutes left. Sausages are poultry or ground meat more often than not, so check the package and hold to 165°F for poultry sausage, 160°F for ground.

Pork tenderloin with cauliflower and onion wedges. Tenderloin is 25 to 35 minutes, cauliflower 25 to 30 at 425°F, onion wedges 25 to 30. A 30-minute pan where everything starts at once. Pull the pork at 145°F and give it the 3-minute rest.

Salmon with broccoli and cherry tomatoes. Broccoli and tomatoes need 20 to 25 minutes, salmon 15 to 20. Vegetables first, salmon in with 20 minutes left, and 145°F on the thickest part of the fillet.

Shrimp with peppers, zucchini and mushrooms. Peppers, zucchini and mushrooms all sit at 15 to 20 minutes, shrimp at 10 to 15. Total pan time about 20 minutes at 400°F, with the shrimp going on with 15 minutes left, to 145°F. This is the one worth knowing for the nights you get home at seven.

What it costs in time and attention

None of my sources puts a dollar figure on any of this, so I am not going to pretend to one. What the method costs is measurable in other ways: the oven time set by the slowest thing on the pan, a preheat you cannot skip, one mid-roast toss, and one or two trips to the oven door to add the fast items. Hands-on work is front-loaded into cutting and drying, which is the part you can do while something else is happening.

The only purchase the method genuinely requires is a thermometer, because FSIS's position is that safe minimum internal temperature must be measured with one rather than read off color or clarity of juices. Everything else on the list you probably own.

425°F
Default oven setting
Easy Everyday Recipes gives 400 to 450°F as the range and names 425°F the practical starting point; Chef Approved Tools calls 425°F optimal for most vegetables. Sources checked September 2026.
1/2 inch
Minimum gap between pieces
Sara Nelson's rule, with the test that a pan which looks full before it goes in is already crowded.
1 to 2 tbsp
Oil per pound of vegetables
Chef Approved Tools. Beyond that, Easy Everyday Recipes reports heavier and greasier rather than crisper.
165°F
Poultry, every form
USDA FSIS safe minimum internal temperature for whole birds, parts and ground poultry, with no rest time required. Whole-muscle red meat and fish are 145°F plus a 3-minute rest; ground red meat and egg dishes are 160°F.

Questions that come up

Piper Cooks describes parchment as optional and says its main job is preventing sticking, which matches my experience. None of the sources here tested browning on a lined pan against bare metal, so the widely repeated claim that parchment costs you a crust is not something I can back with evidence. What is documented is that a preheated pan jump-starts browning on contact, per Chef Approved Tools, and that only works if the food touches the metal.

You can cook in it, but expect worse results. Nelson's guidance is to switch from glass or ceramic to rimmed aluminum, because metal conducts heat more effectively and allows surface moisture to evaporate while glass and ceramic trap steam around the food. Easy Everyday Recipes makes the same case about deep casserole dishes versus a sturdy rimmed sheet. If glass is your only option, cut smaller, spread wider, and accept less browning.

Almost certainly one of the two things heat cannot fix. Nelson's diagnosis is crowding, where trapped steam has nowhere to go, and surface water, where even a thin film creates steam on contact and delays browning. Space the pieces half an inch apart, dry them with a towel before oiling, and split onto two pans rather than piling one.

Use a thermometer in the thickest part, away from bone, fat and gristle, and look for 165°F, which is the FSIS minimum for all poultry in every form. FSIS is direct that color of meat and color of juices are not accurate indicators: its own research found more than 25% of fresh ground beef patties browned before reaching the safe 160°F. For a whole bird, TemperatureTool's reading of the guidance is to check the innermost thigh, the innermost wing and the thickest part of the breast.

No. Clarke's answer at Well Plated is that covering roasted vegetables is unnecessary and traps moisture, which steams them. If you need to hold a finished pan, FSIS's hot-holding minimum is 140°F or above, using something like a warming tray, and its limit for perishable food sitting out of refrigeration is 2 hours, dropping to 1 hour above 90°F.

Yes, as long as the prepped food goes back in the refrigerator rather than sitting on the counter. FSIS defines 40°F to 140°F as the danger zone, where bacteria can double in as little as 20 minutes, and caps out-of-refrigeration time at 2 hours total. One caveat from the method rather than the safety rules: washed vegetables need to be dried before they go on the pan, so dry them at prep time and again if they have wept in the fridge.